Event Registration
Setup Details

The entire system is built out using no-code tools. Code has been used very scarcly to tie up a few elements.
Architecture
- Webflow for the website form
- Webflow CMS for the registration type
- Google Sheets for database
- Make.com for automations
- Stripe for Payments
- HTML for the custom emails
- PDF4me to create customer reciepts
- Javascript for registration options
Modular Development
When we created the first version of the registration system it was not modular and it grew to have a lot more functionality and features which became a problem to maintain and manage. Things would break, automations would pause and fixes would take significant time.
Therefore in this version most of the functionality and features have been separated.
The webflow CMS is used to create the different type of user registrations. We currently have four main types:
- Co-host Registration
- Field Partner Registration
- Member Registration
- Group Registration
These can be found in the webflow CMS.
Co-hosts, field partners and member type registrations are setup as custom types (should be edited by developers only). While group registration is set as the default allowing you to create new group types without having to edit any code or do any significant updates.
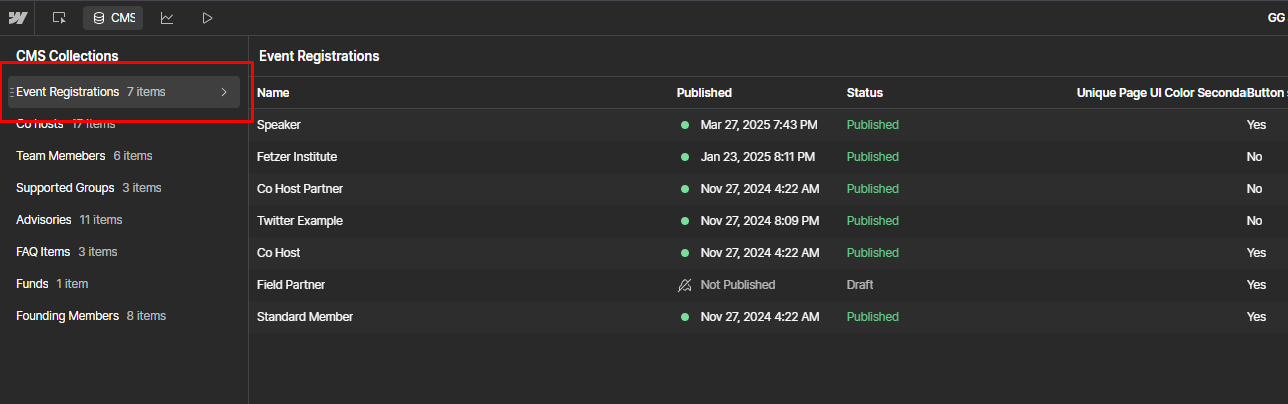
In the example above you may be able to "speaker" which was a new type of user O4J needed towards the end of the event registration. The CMS was used to create this type of custom registration.
You can also see other examples here like Fetzer Institute, Twitter example. This is what the fourth option is for. So instead of people who work for Fetzer Institute registering seperately than the CEO paying for each person seperately, the group registration should be used as we cannot track payments when a different email is used for payment and registration.
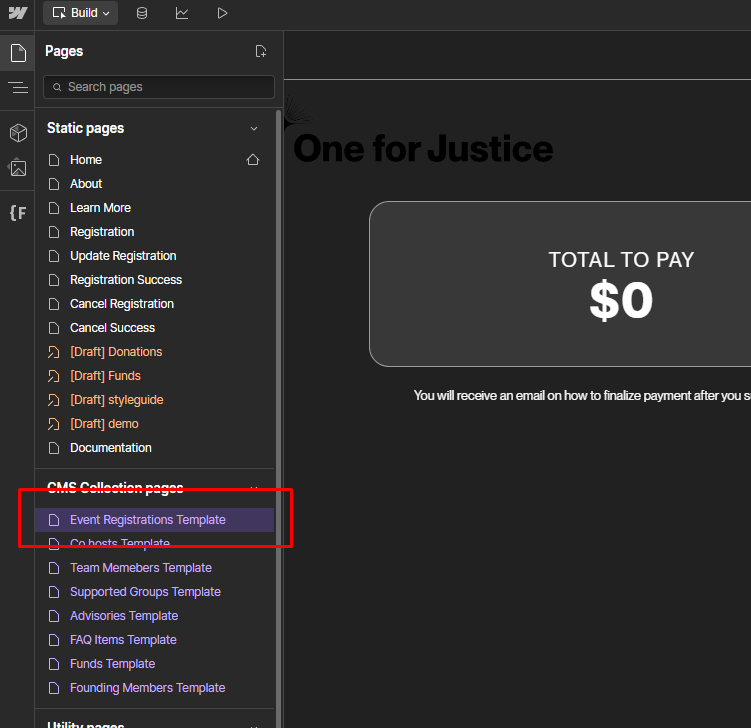
Creating Group Register
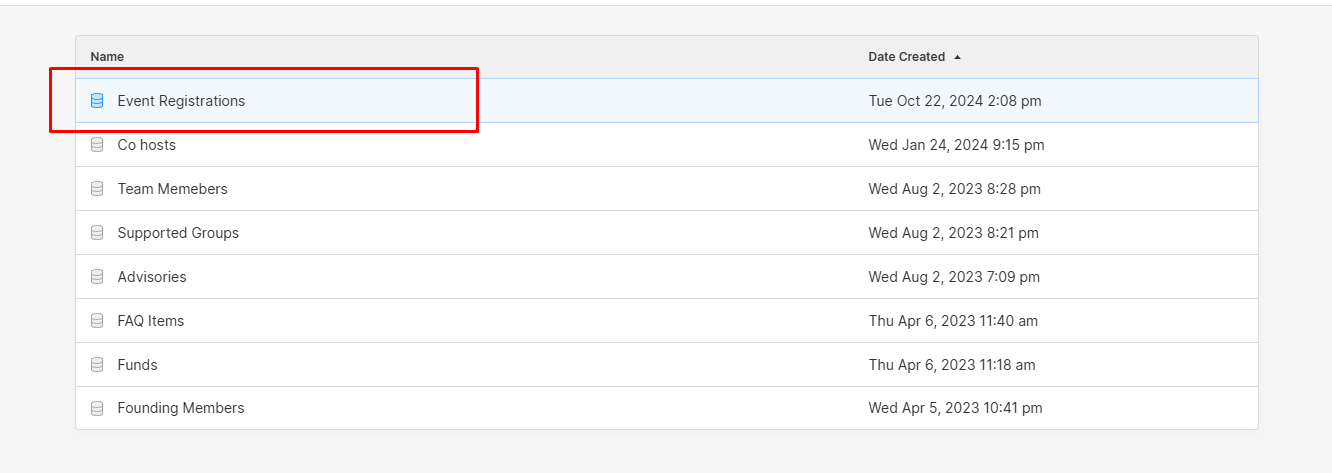
1. Access the CMS and click "collections"

2. Select "Event Registrations"
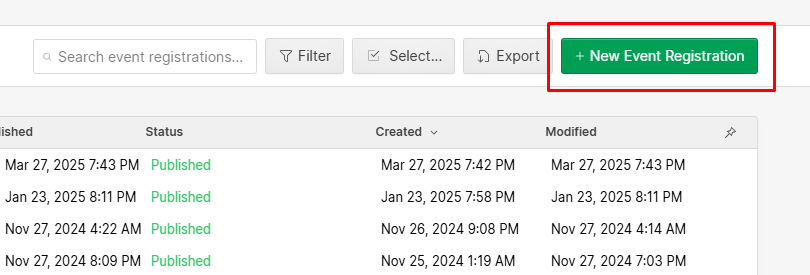
3. Click the big green button which says "New Event Registration"
4. You will then be asked to fill out the fields.
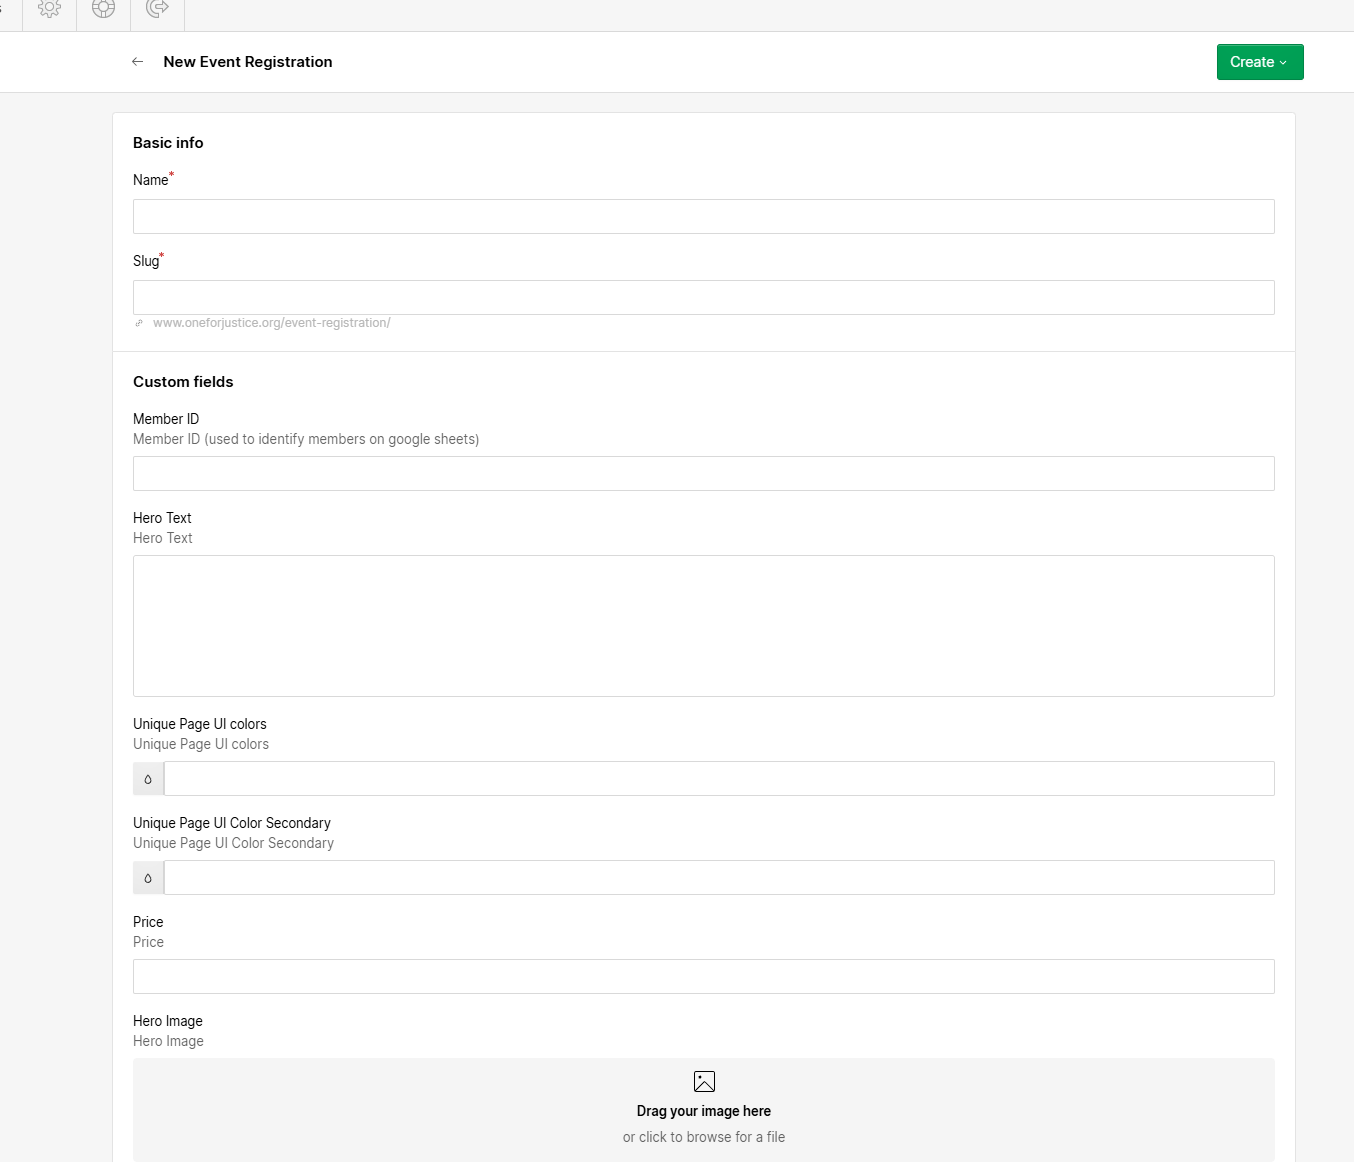
- Name = Name of the group
- Slug = the url on the page (this is automatically generated based on name)
- Member ID = Put a name which will be easy for you to track. This is used to identify users who registered under a particular group in the Google sheets/database. This is also the ID you would send to the person who is buying for the team. They will need to share it with everyone registering under their team as it will appear as an input field requesting "unique code" which they will need to enter in order to submit the registration. See image example below
- Colors = for the the gradient sphere animations. You can just leave it blank or copy the colors from co-host/member/field partner
- Price = for co-host/members. So it can be left blank.
- Hero Text = The name of the group
- Button toggle = If it's on, it will place the button link at the buttom of the registration page.
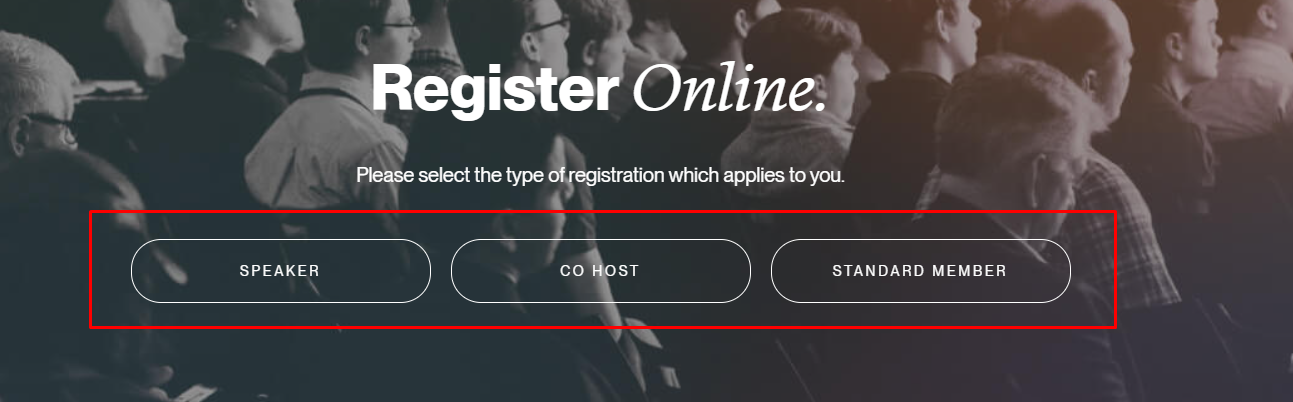
Image example of Member ID field

5. When you have filled everything you can click "create" in the top right corner.
It will create a custom group registration like these example pages, which you can locate based on your slug/URL:
https://www.oneforjustice.org/event-registration/speaker
https://www.oneforjustice.org/event-registration/fetzer-institute
https://www.oneforjustice.org/event-registration/twitter-example
The registration form can be found in the webflow dynamic pages "Event Registrations Template". This area should be edited by a developer only.
As this form is used to collect information from various user types, we had to use JavaScript here in order to be able to detect the user type and send the correct registration/details and payment details into the Make.com automations.
On the page itself, you will find a form with all the HTML options for all user type registration, there is also hidden fields which are used to insert data based on user selection.
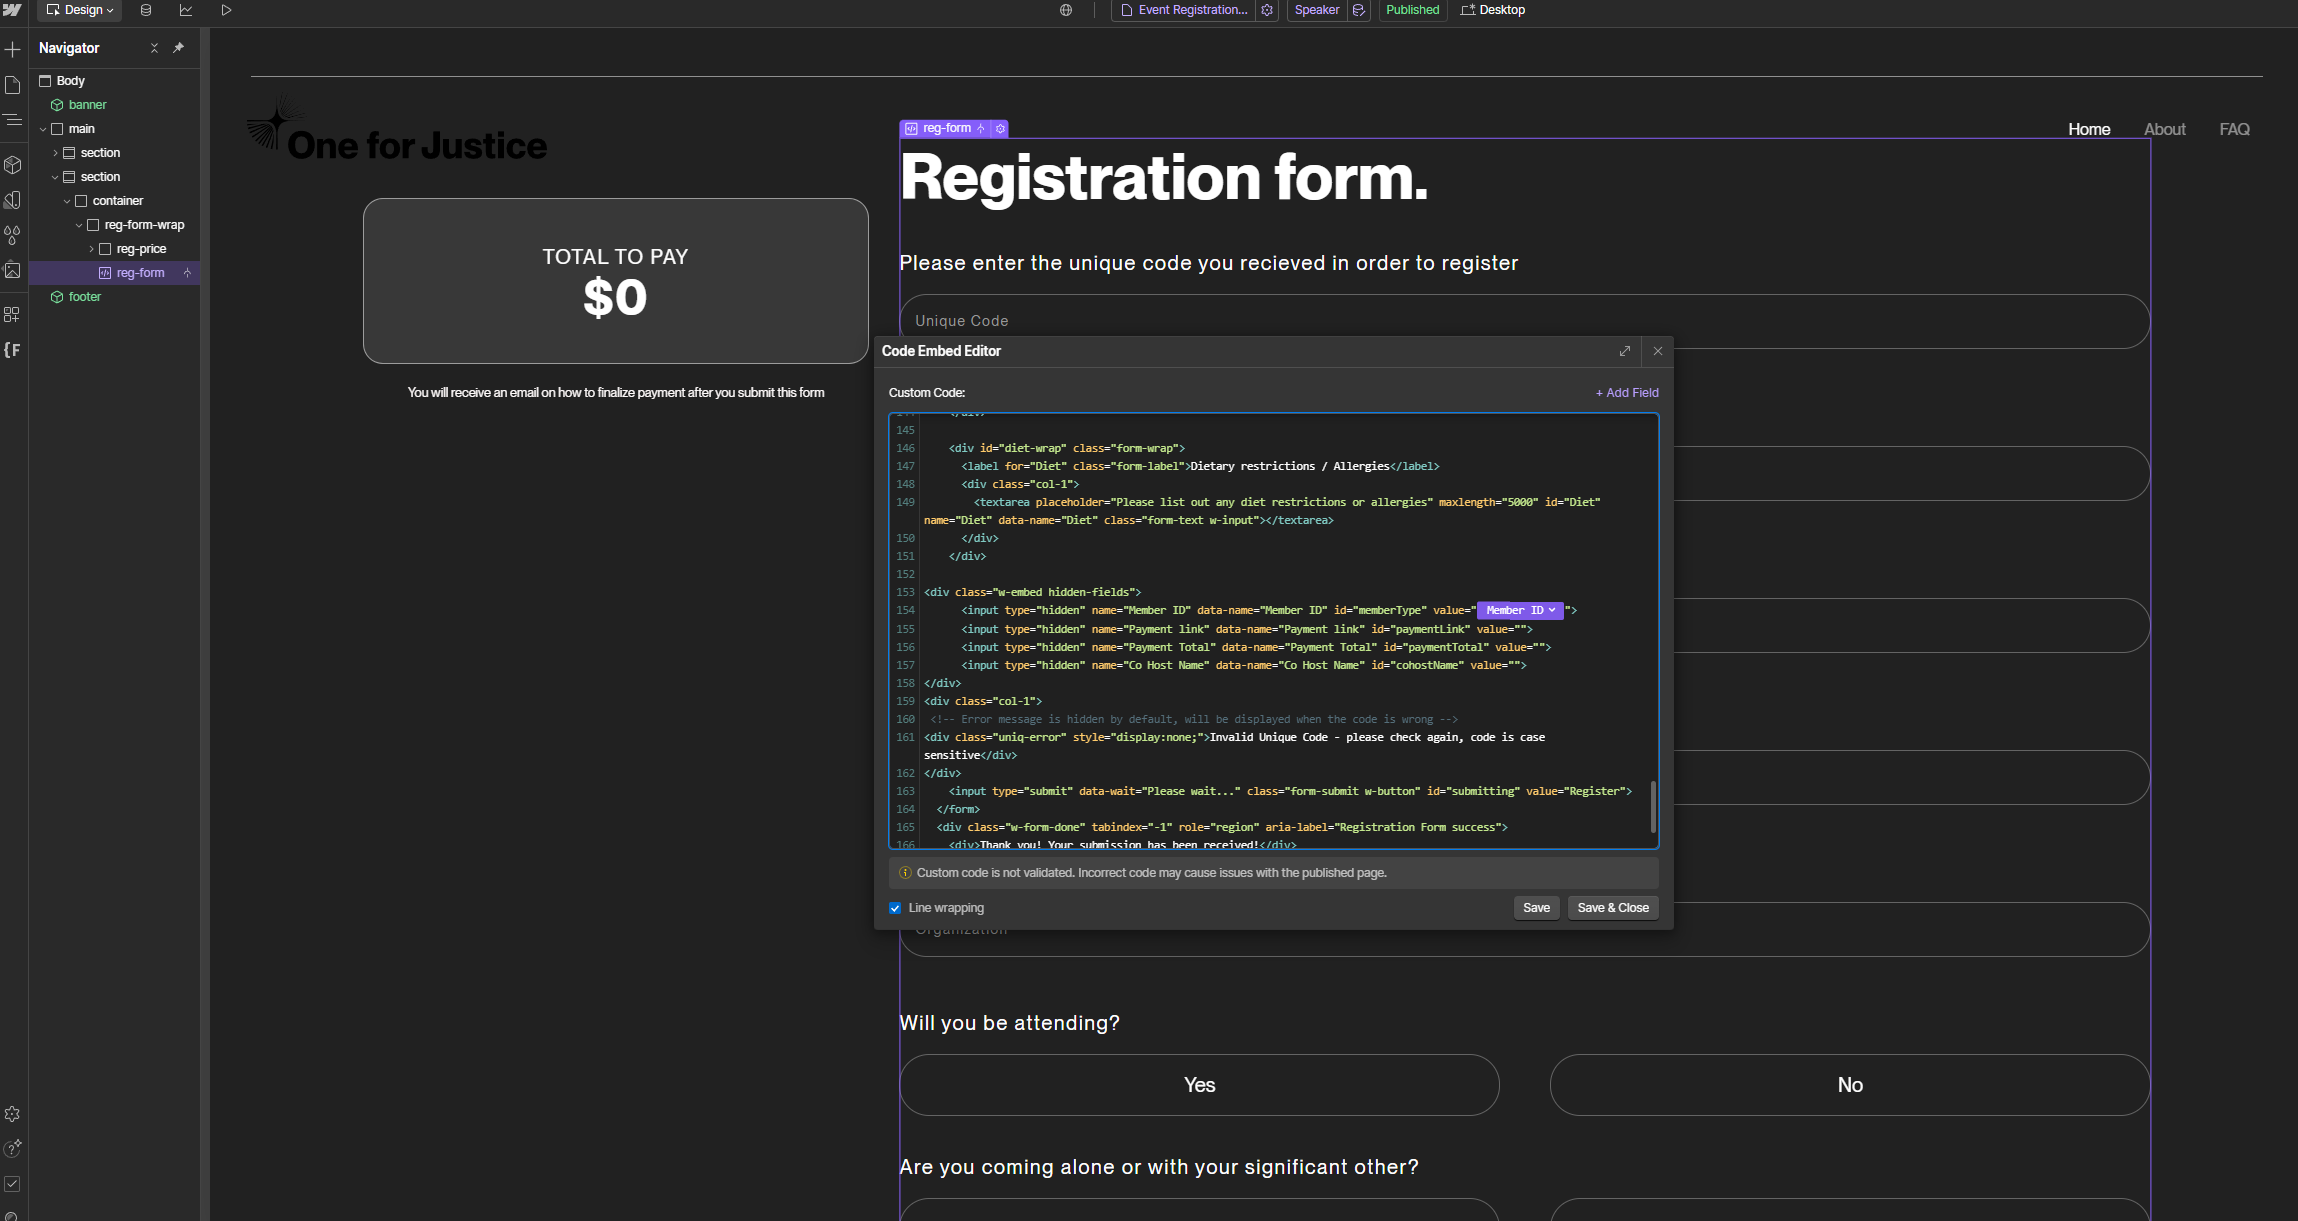
In the script area of the page setting you will find a script which creates functionality based on which page the user is and what options they have clicked. In short, we store all the options into variables and add the variables into the hidden fields based on user selection.
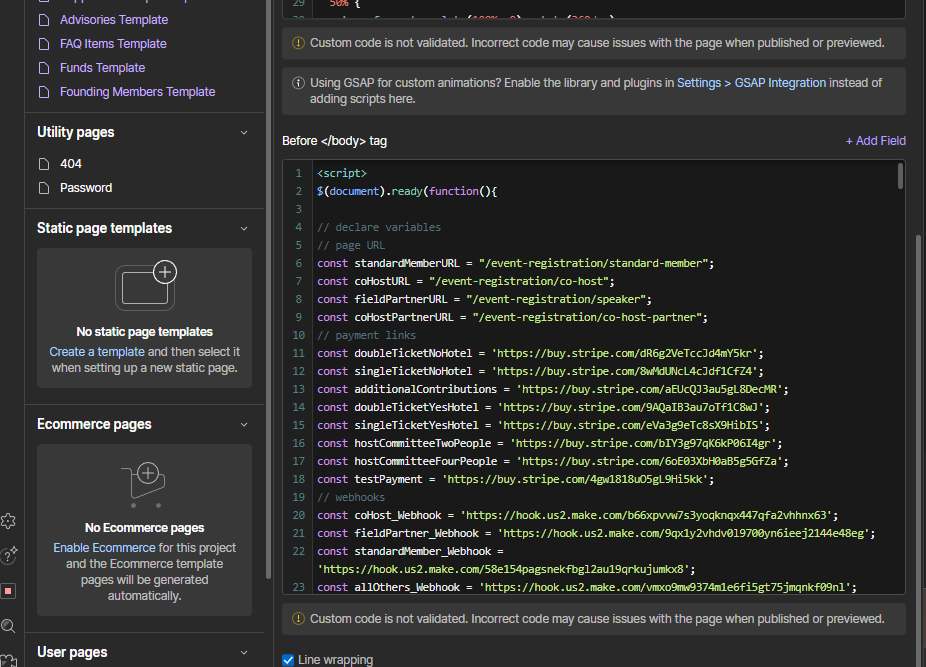
How it works
- We check the URL, to see if it is a member, field partner, co-host. If it's not one of these then it's a group type user.
- This will show/hide specific form HTML options a user can interact with.
- Based on user selection, we will store payment links or adjust pricing and Webhooks into hidden fields/form action.
- The Webhooks come from Make.com which activate a specific automation.
This area was recently edited to adjust for the "speaker" type of group. It can be returned back to it's original state by activating field partners again in the CMS and adjusting the url in the fieldPartnerURL variable.
If you plan to adjust prices for next event, you can simply just create new payment links in stripe and replace them with the existing links here. Should be done by a developer so that none of the code is accidently removed. *
Payments are setup through Stripe Payment links. We are leveraging their security over building out our own app which would handle payments.
Getting Payment Info
Due to Make.com's automation process requiring a much more complex setup, fetching payment info has been done through google sheets.
The Setup
1. A google sheet has been setup using appscript and the developer api code to fetch payment info from stripe and store it into the google sheet.
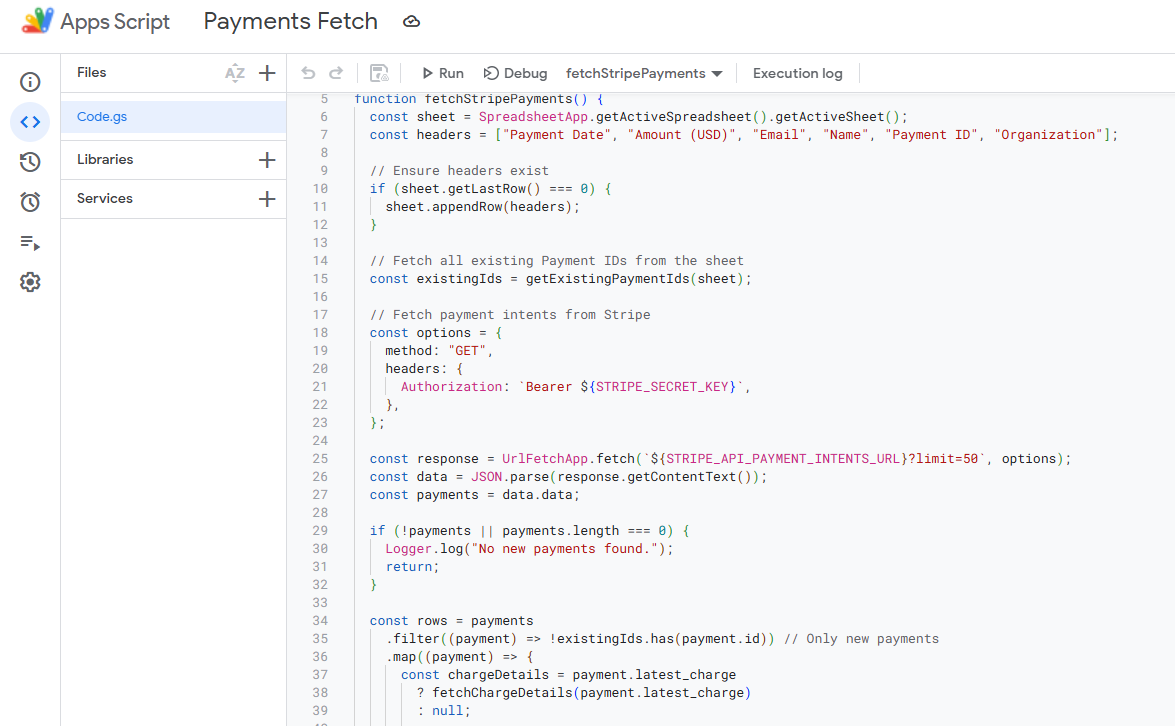
The developer API is set as a "read only". Meaning that a developer can view information from the stripe account, but not alter it. This is very important because giving developers full access would allow them to move money, which should be avoided always as multiple people have access to the various sheets. This is the only sheet which only the admin@ email has access to.
This script which I have setup is running on a loop, so whenever a new payment is made into the account the information is printed into the google sheet. It remains up to date at all times.
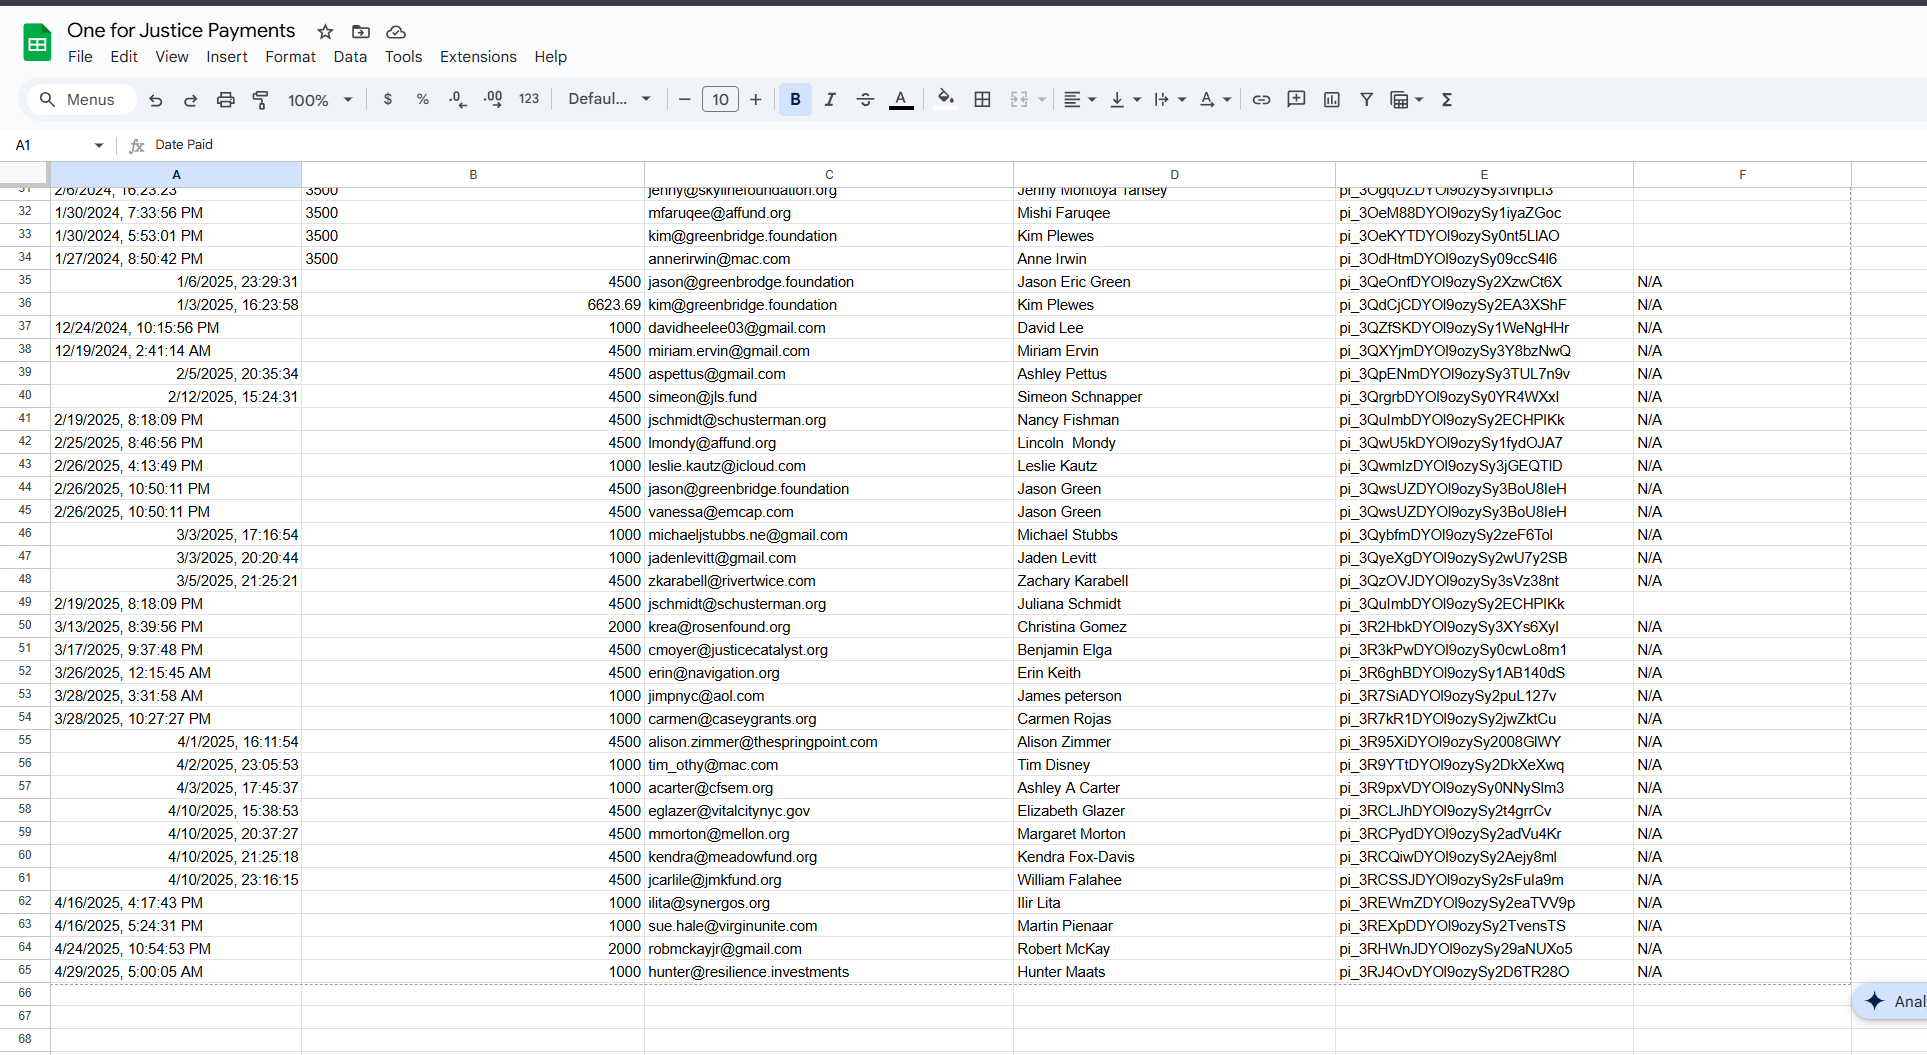
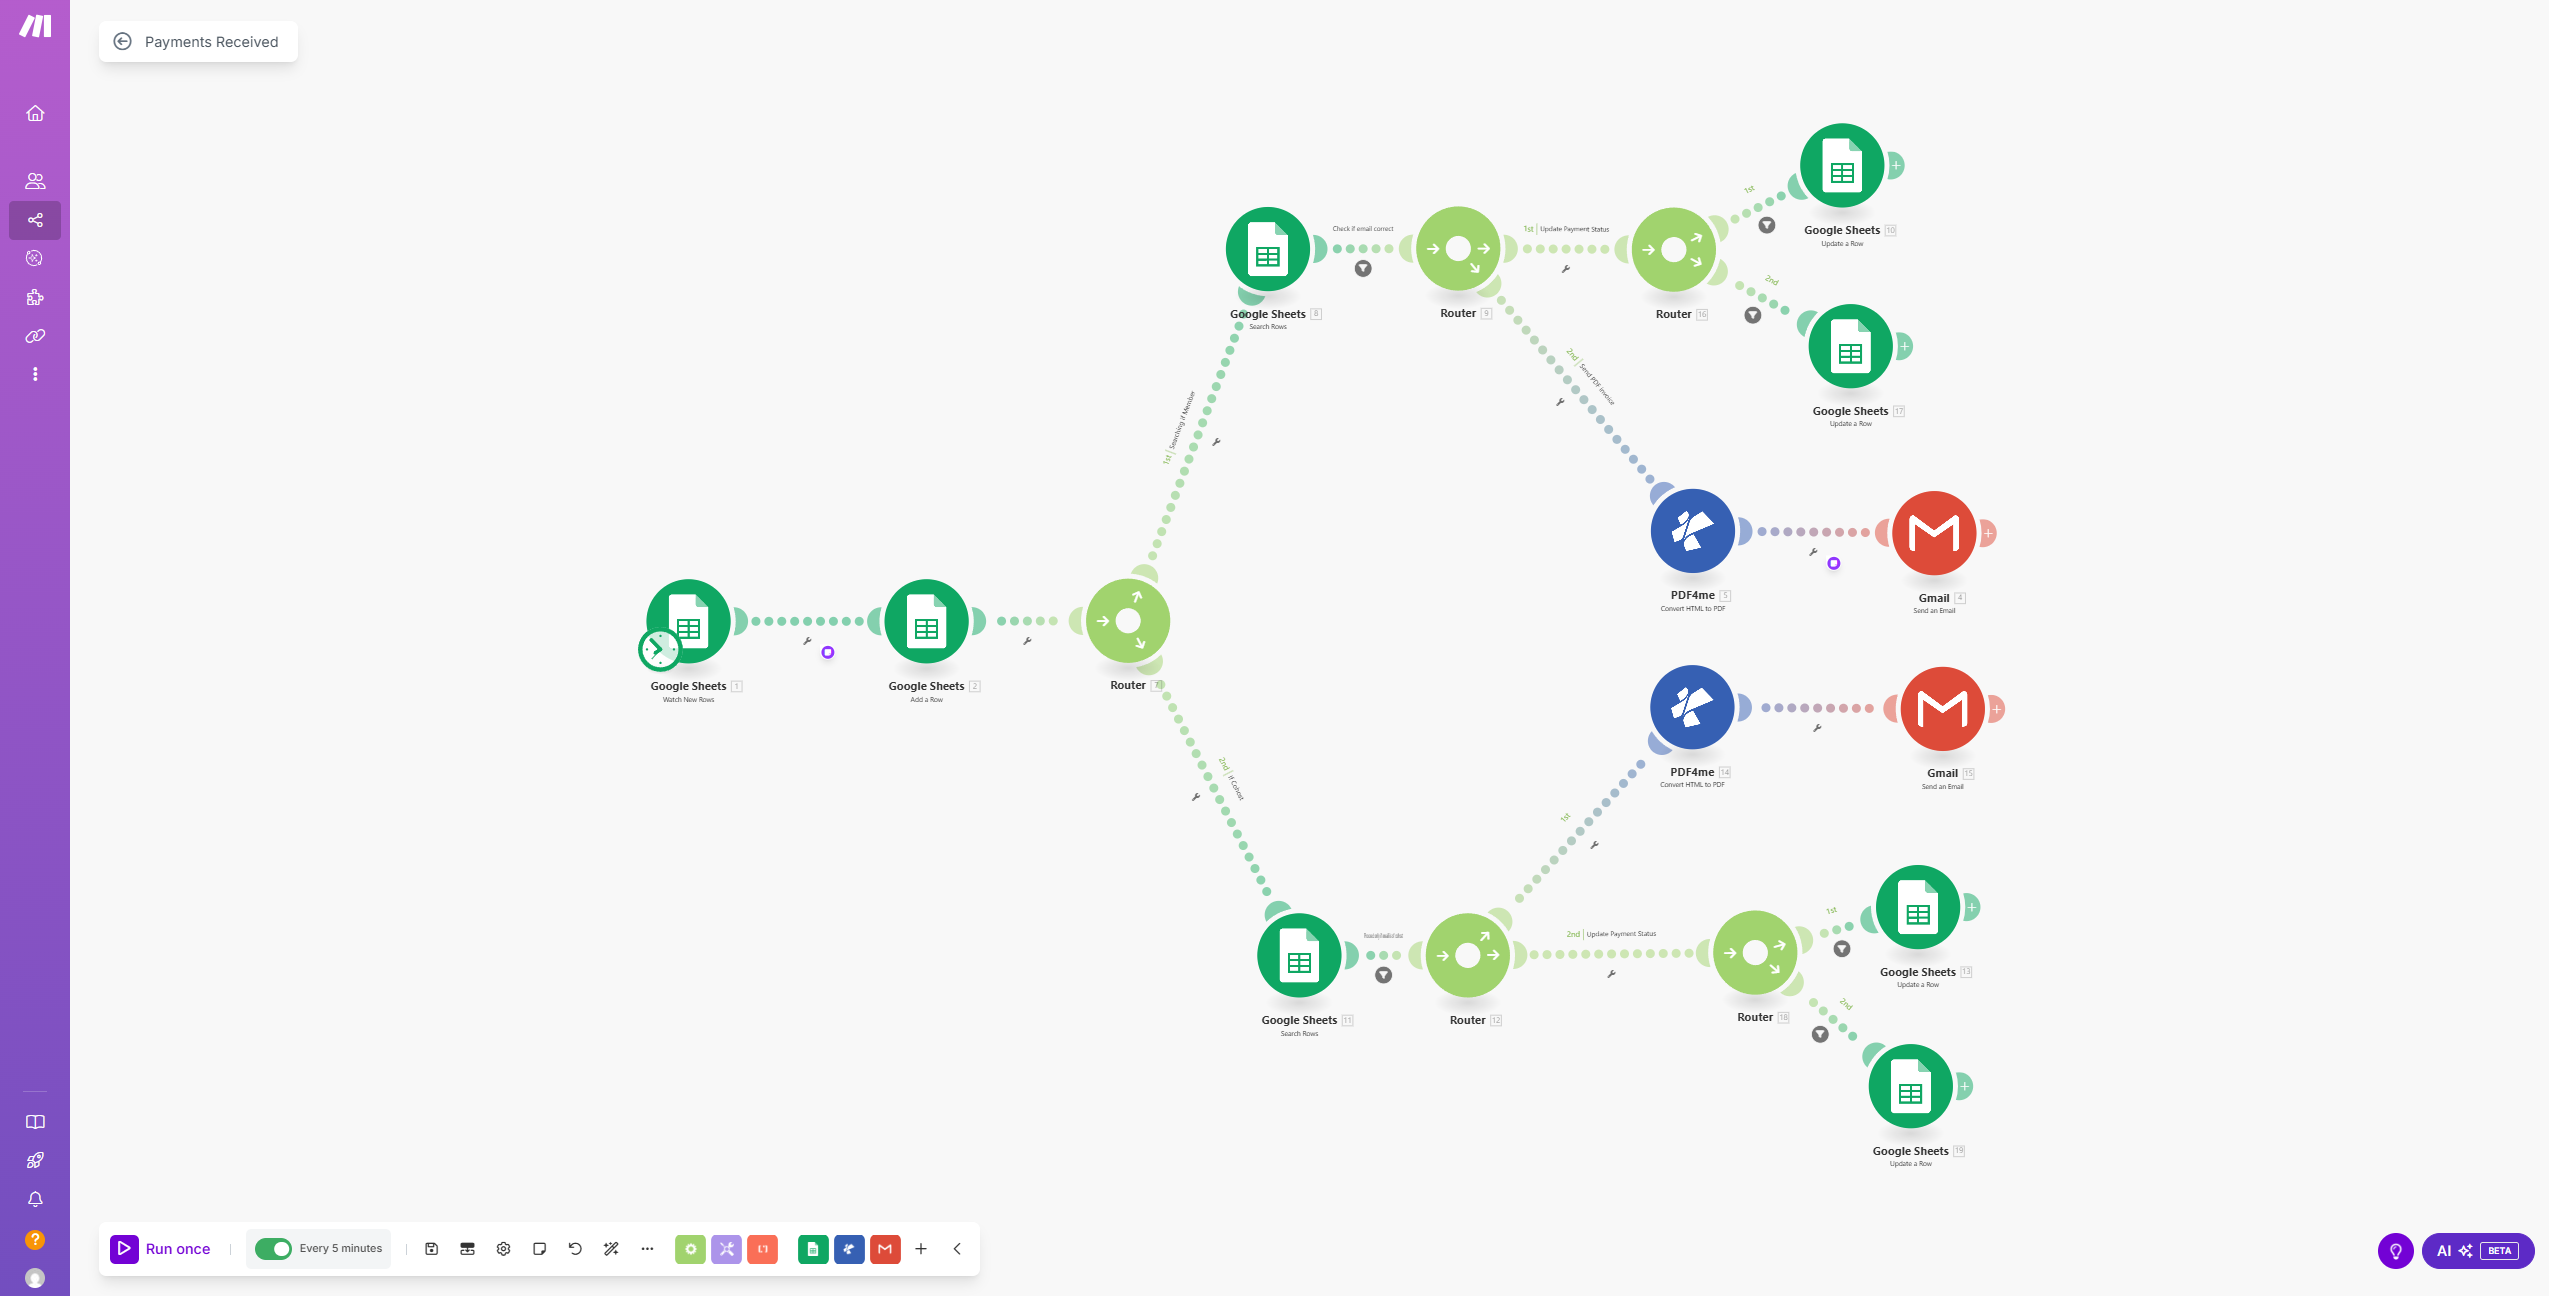
2. Make.com is used to pull data from this sheet into the google sheet which is used as a database for all of O4J. This automation does several things.
- First we router the info to check if the payment email is in the members list or the co-host list. (These are the only type of payment registrations at the time of the setup).
- If it's in either one of these, we change payment status from "unpaid" to "paid".
- We also grab the payment information and create a HTML field which is converted to PDF using PDF4me.
- We send an email notifcation to the person who made the payment with a reciept.
Payment Reminder
There is an automation setup for payment reminders. However, currently it's setup as manual. It can be automated to automatically send reminders with a few slight adjustments on make.com
Currently we're using a list where we dragged over all the unpaid users into that list used make to send them an automatic email with all the payment and register information from their registration.
Manual Reciept Sending
Due to unforeseen circumstances, where the person who paid and the person who registered did not use the same email. Receipts were not sent out, or would be sent out to the wrong person. There is a manual receipt sender automation setup for this circumstance. It can also be used to create custom invoices.
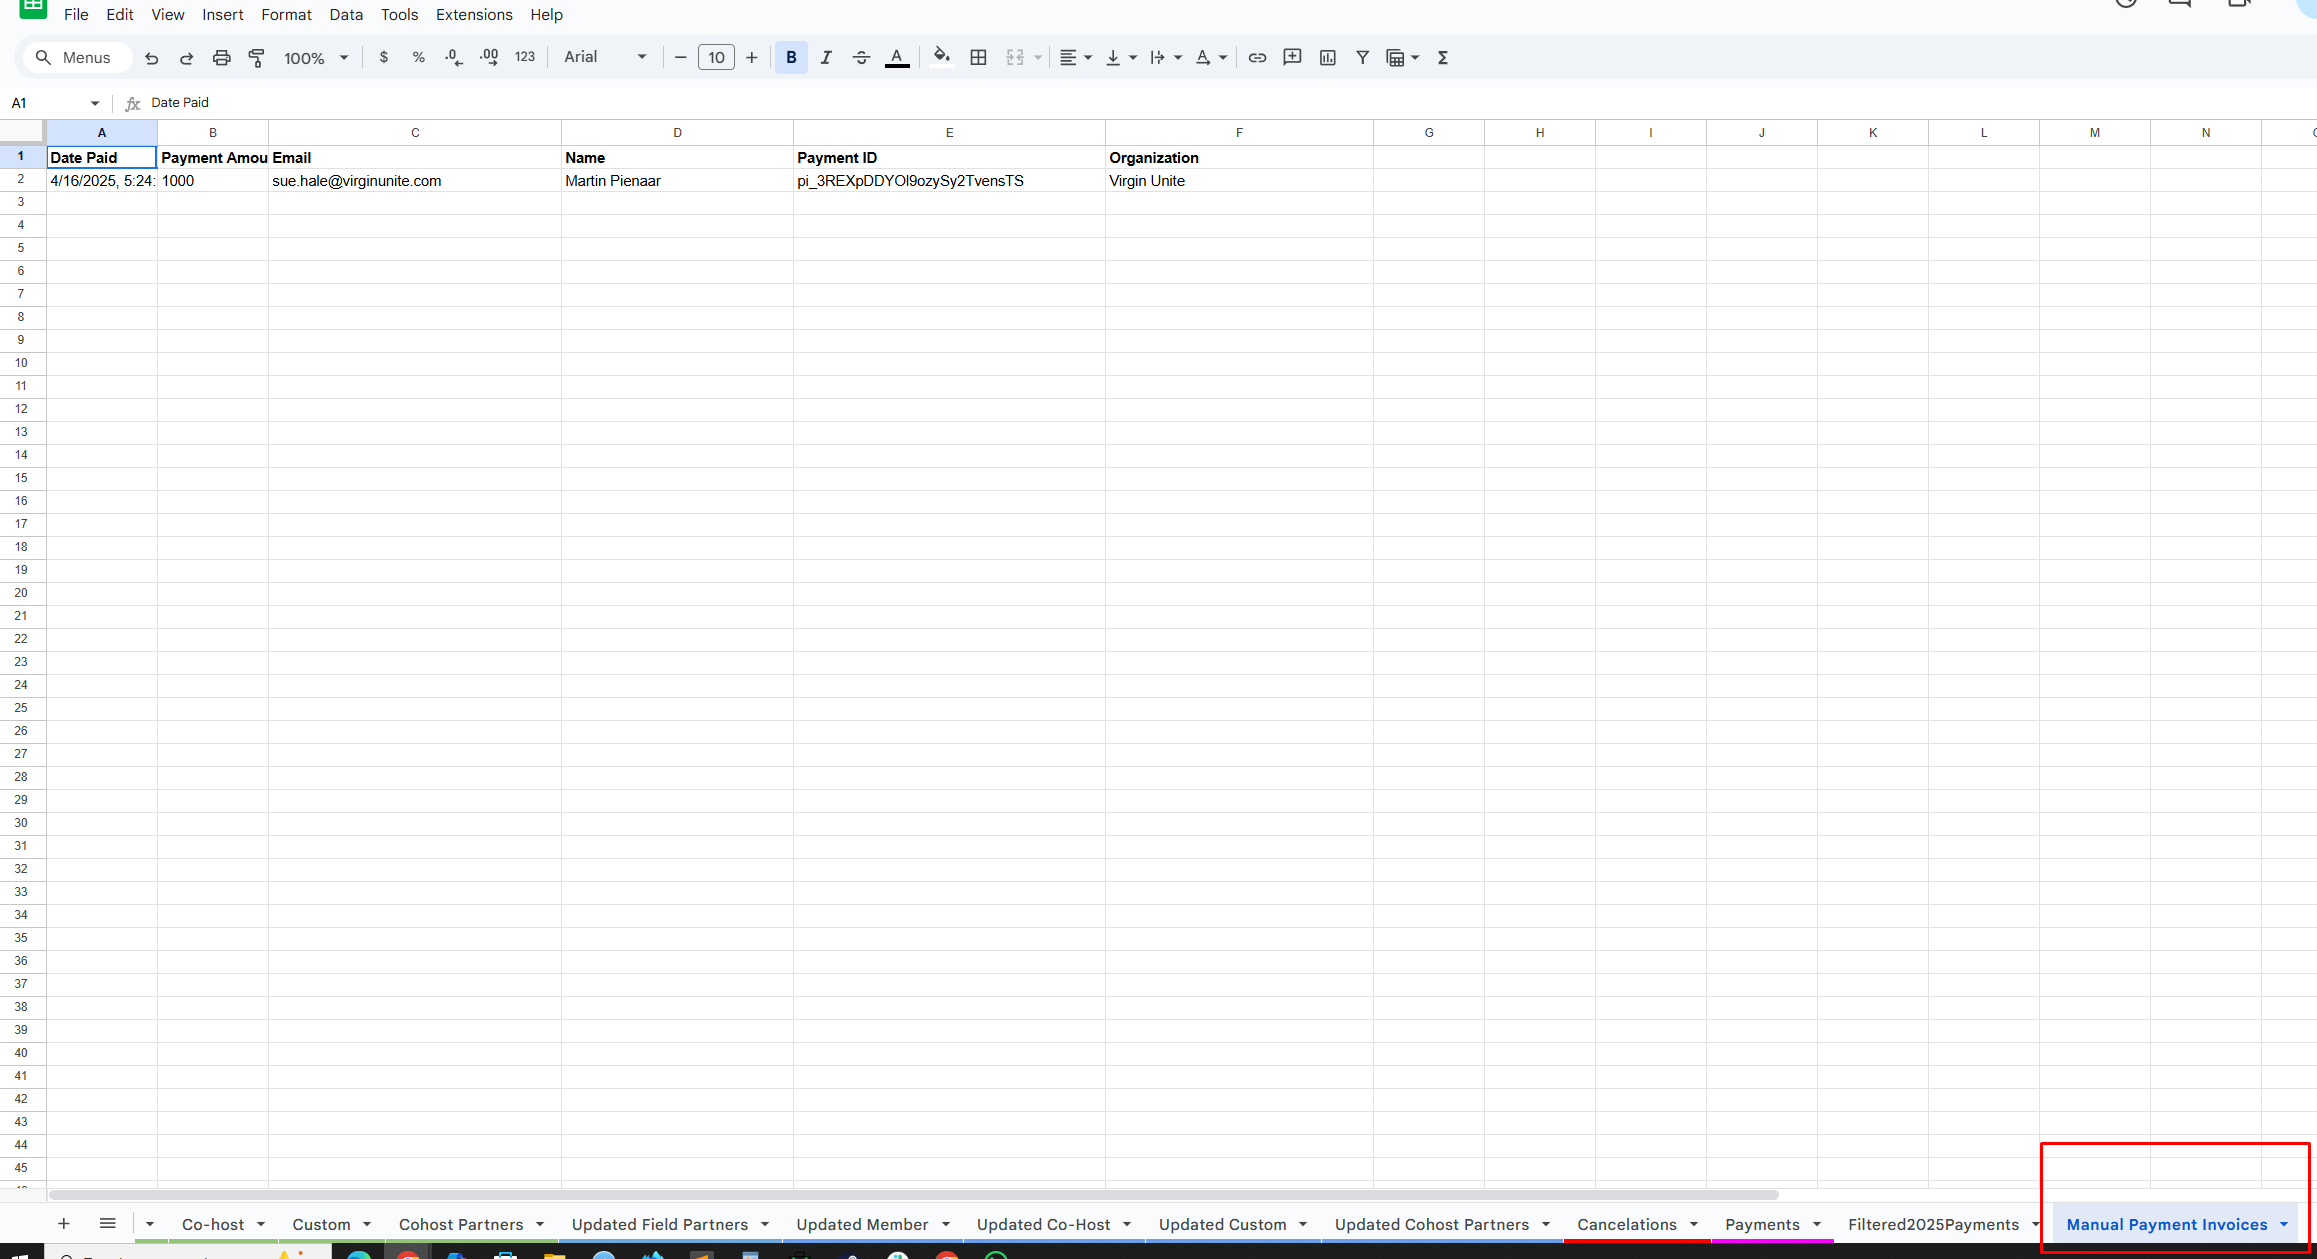
- In your main google sheet database there is a tab called "Manual Payment Invoices".
- If you go to this tab, you can see some of the manual reciepts I created recently.
- You can copy the information from the "payments" tab, or just add the information yourself if you're creating an invoice for a direct bank payment. You will need to put in the date, payment amount, valid email, name, payment ID (generated by stripe, use your own if creating custom), and Organization.
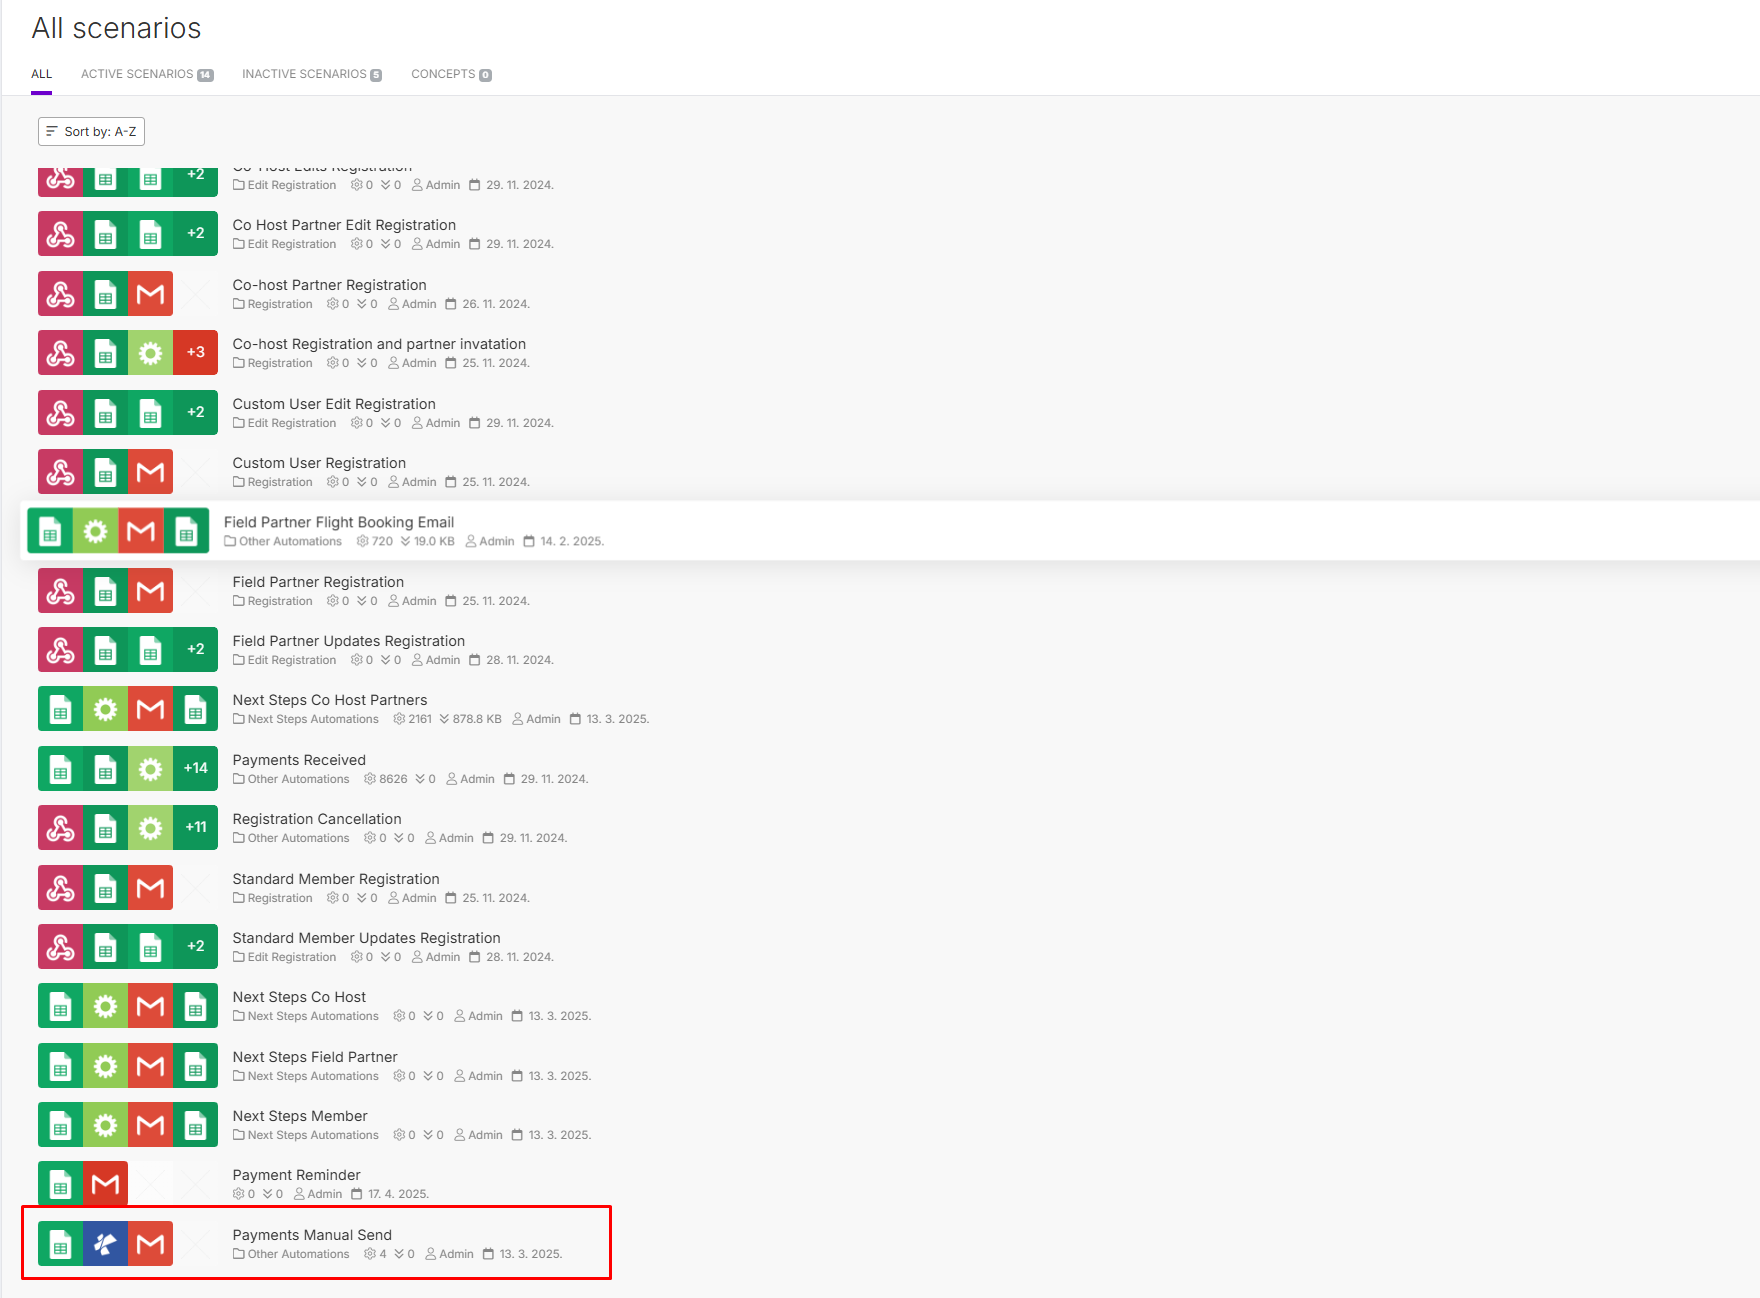
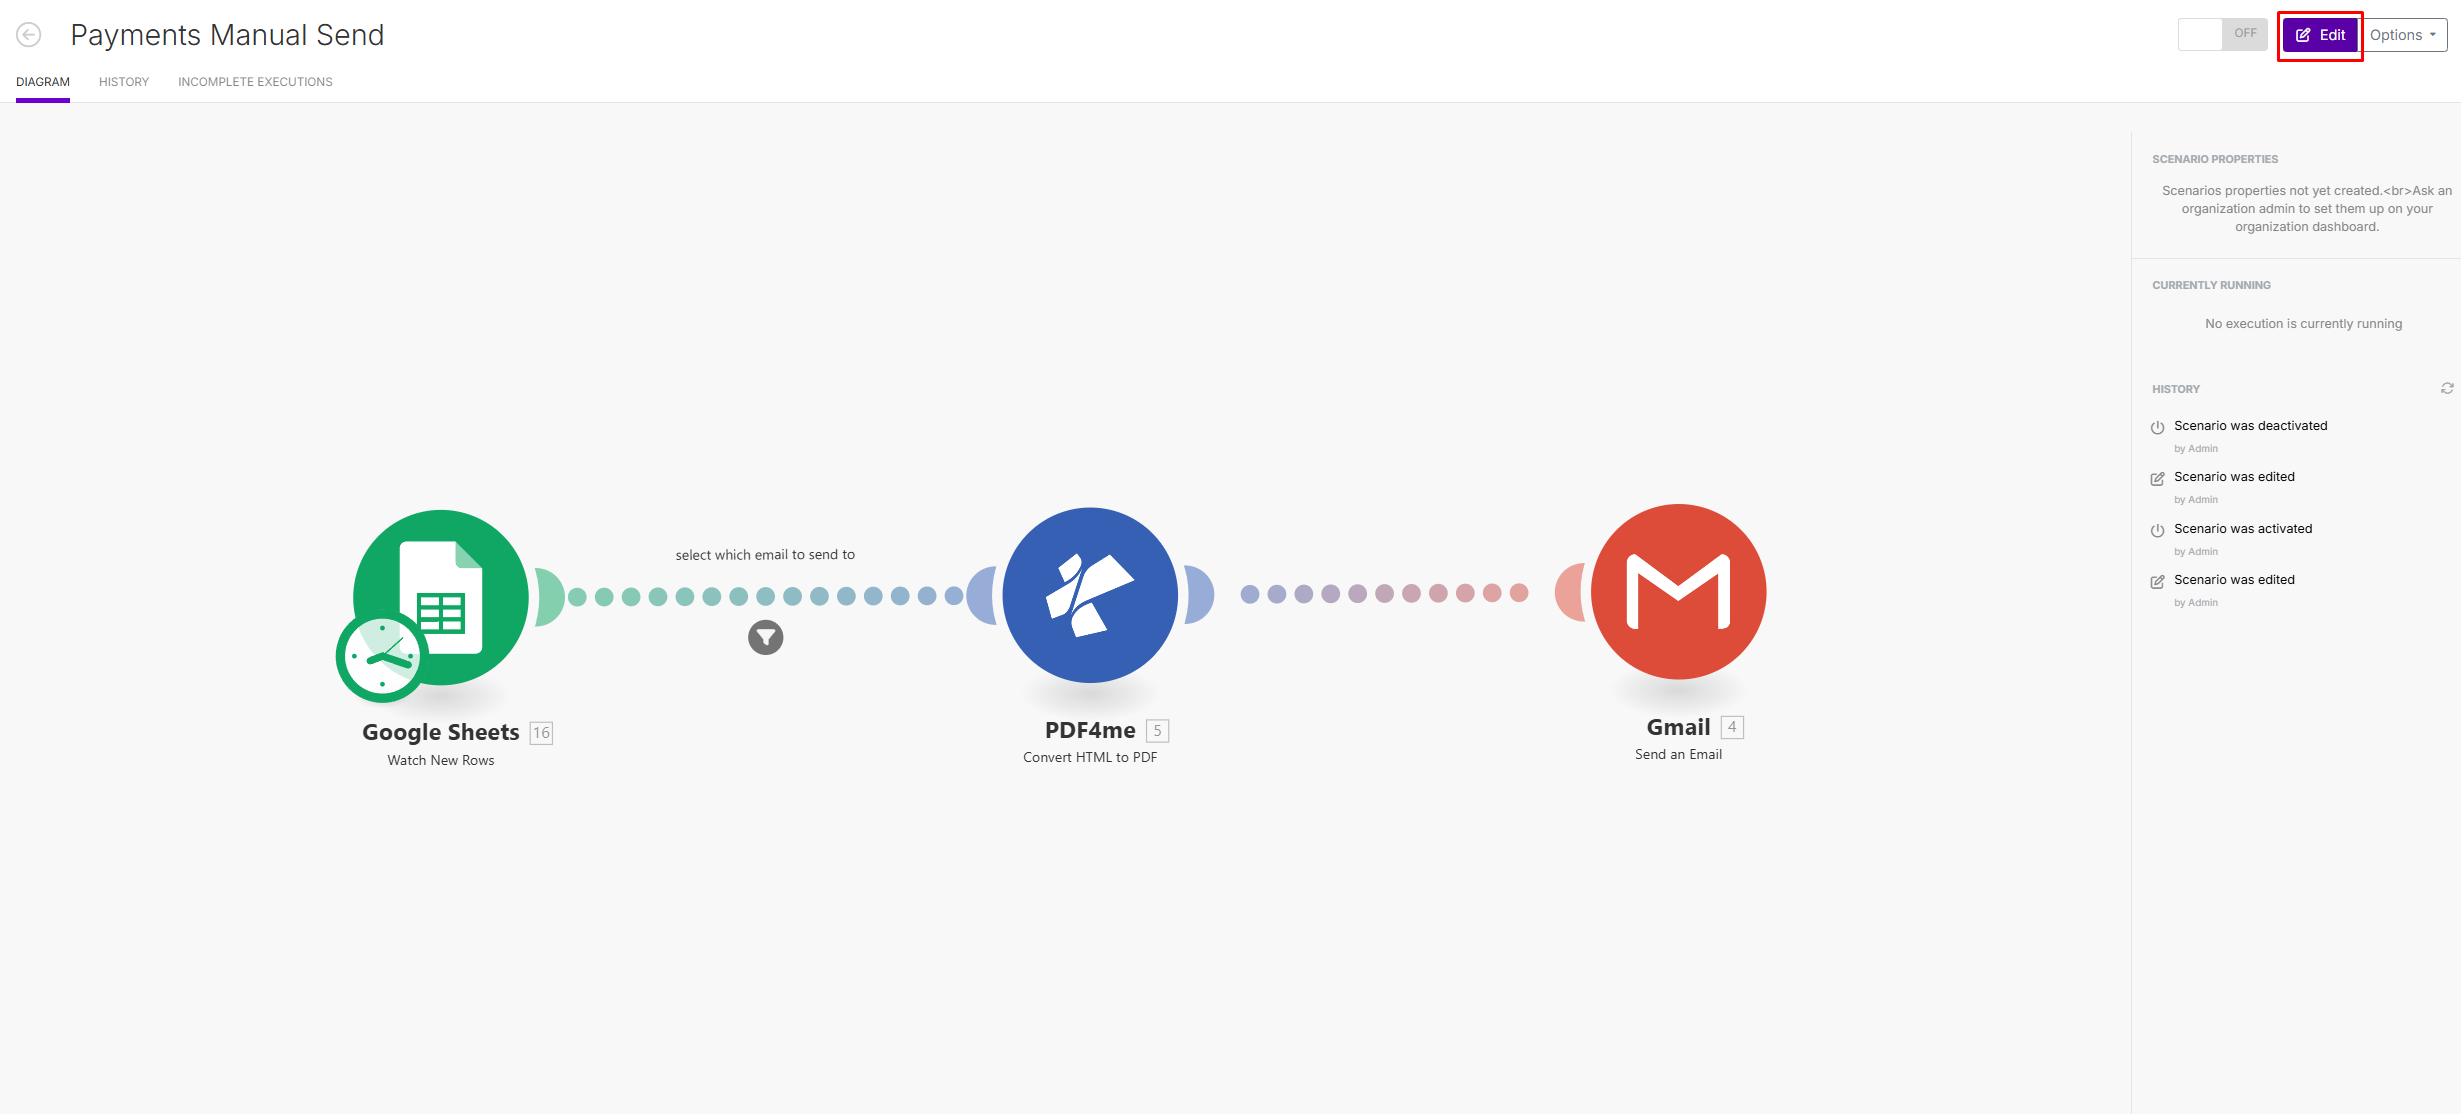
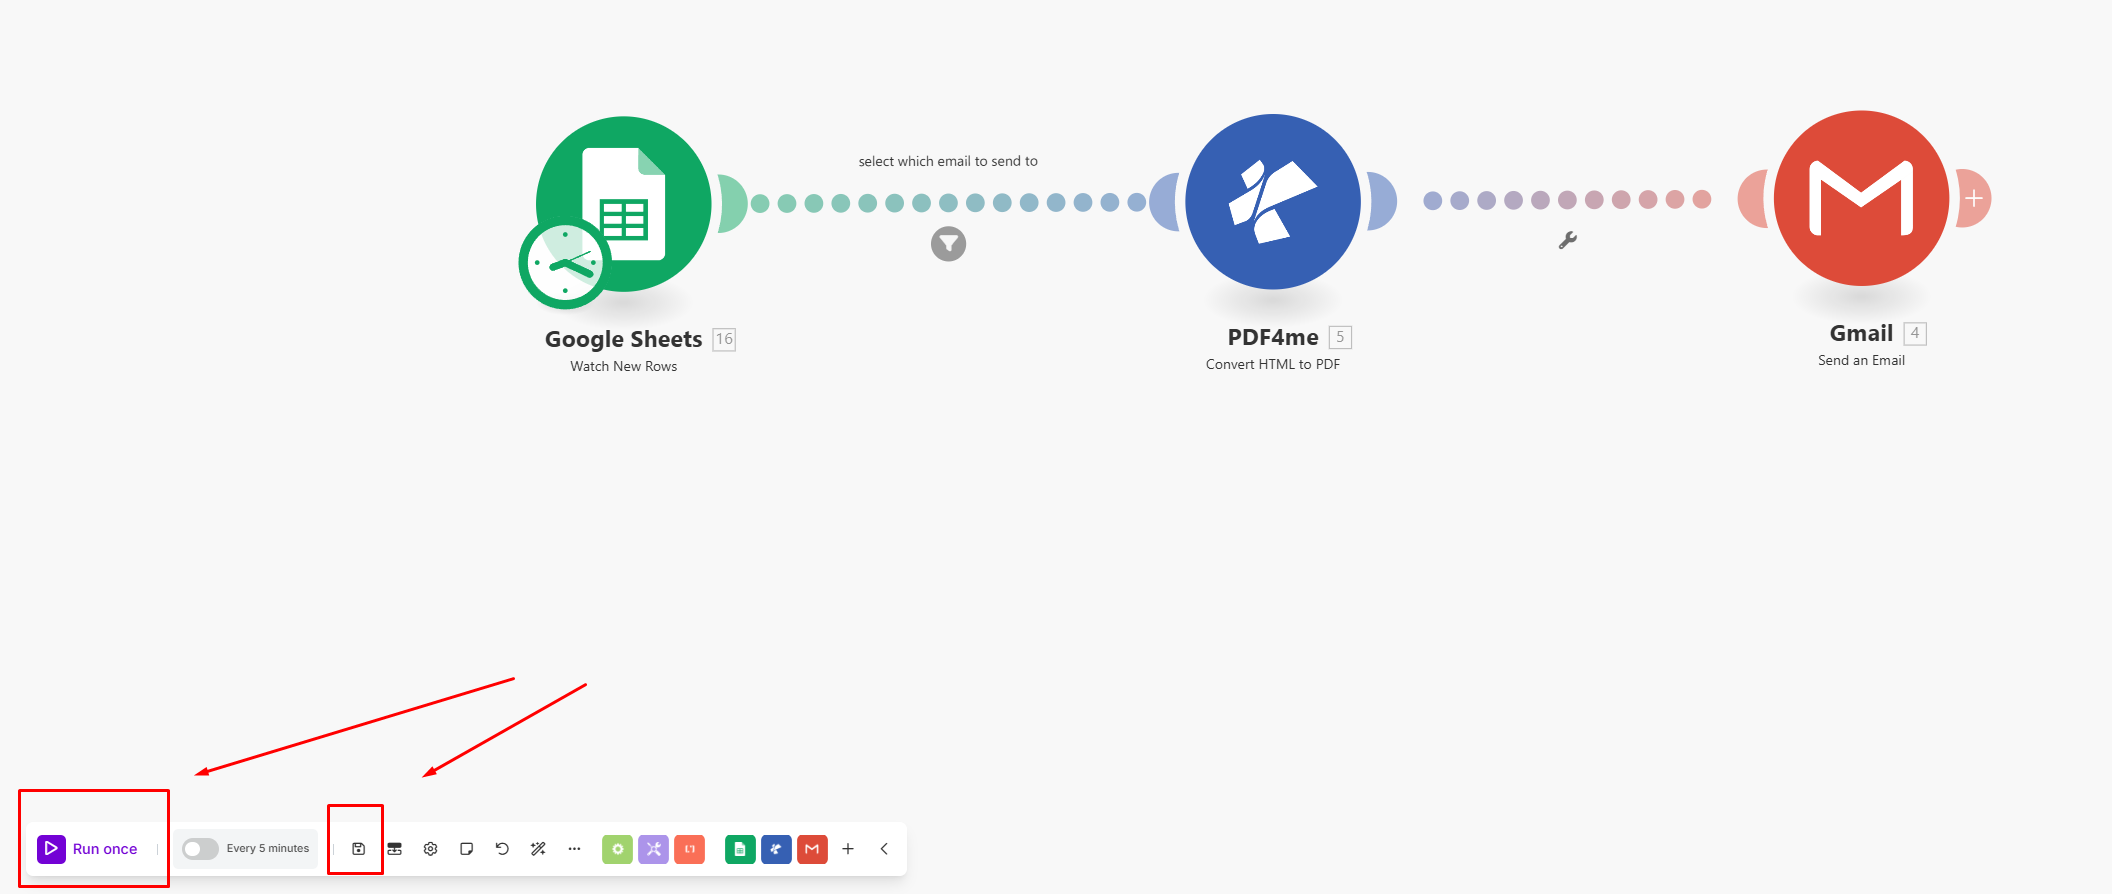
- Once this information has been added go over to Make.com and find the "Payments Manual Send Automation".
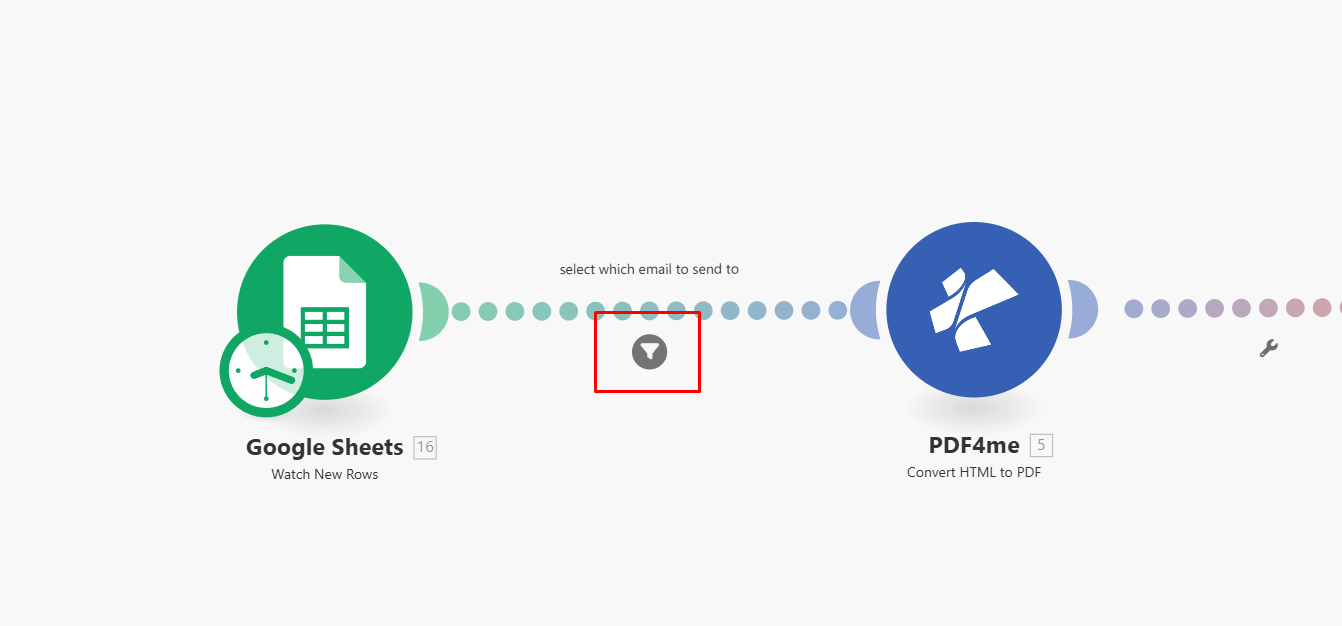
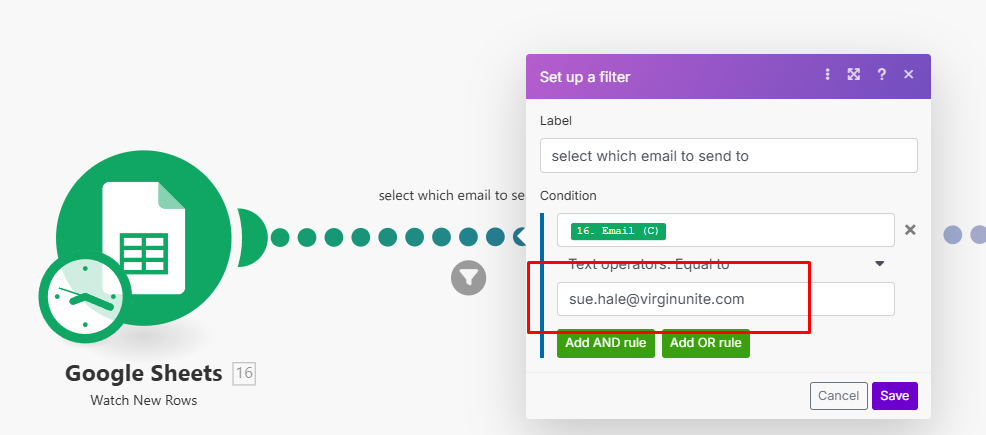
- In the automation, there is a filter option, where you've got to change the current email inside to the email of the person you've just added into the "Manual Payment Invoices" tab in the database.
- Click "save"
- Then click the purple button in the left corner which says "Run Once".
This will create a PDF invoice and send a custom email to the user with the invoice. Below are screenshots of the various steps.
Additional Notes
The errors which appear in emails sometimes is caused due to data coming through where the person who payed is not in either list co-host/member. Those people who pay for others should be using the "groups registration" in the CMS. In the current setup those payments were made directly to the bank, so we didn't have any functionality to handle this scenario.
These errors are set to ignore as they do not affect the automation. But you will recieve an email when it happens so that you are notified that there is a person in the payment list who is not using a registered email.

Field partners have several interactions and options.
- They have their own sheet in the main database which they are stored into with the id of "ID-fieldpartner-2025" which is used in some of the automation processes. The year at the end doesn't really matter. Using the same ID in 2026 etc is totally fine. It's just the name.
- If this name is going to be changed, the code needs to be adjusted to the new name on the registration page and in a few automation scenarions.
- Field partners receive emails which have buttons that allow them to "edit registration" and "cancel".
- If field partner edits their registration, a automation will run which will change their Updated status and add them to the "Updated Field partners" tab in the main database.
- The edit button in the email has attributes, so when it is clicked the button adds attributes to the URL of the page.
- Edit button attributes which are displayed in the page URL are used to add data back into the form fields through some JavaScript on the "edit registration" page.
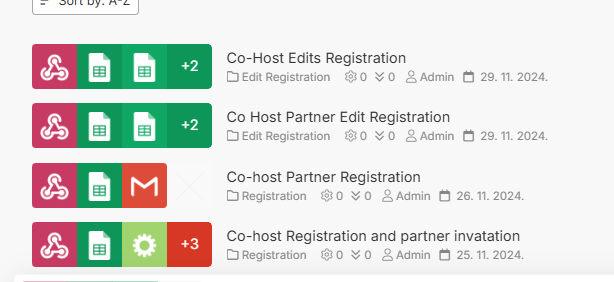
- Field Partner automations are seperated (modular) in order to be able to easily edit, test and fix bugs.

Like field partner and co-hosts members have several automations.
- They have their own sheet in the main database which they are stored into with the id of "ID-member-2025" which is used in some of the automation processes. The year at the end doesn't really matter. Using the same ID in 2026 etc is totally fine. It's just the name.
- If this name is going to be changed, the code needs to be adjusted to the new name on the registration page and in a few automation scenarions.
- Members receive emails which have buttons that allow them to "edit registration", "cancel" and "pay".
- If the members edits their registration, a automation will run which will change their their Updated status and add them to the "Updated Member" tab in the main database.
- The edit button in the email has attributes, so when it is clicked the button adds attributes to the URL of the page.
- Edit button attributes which are displayed in the page URL are used to add data back into the form fields through some JavaScript on the "edit registration" page.
- The payment button receives the URL based on what the member chooses through the registration, hotel/no hotel, significant other/alone. This is setup on the "Event Registration Template" page in webflow.
- Member has their own automations, like field partner and co-hosts.

Co-host follows a similar pattern to the other two; field partners and members with a few additional features.
- They have their own sheet in the main database which they are stored into with the id of "ID-cohost-2025" which is used in some of the automation processes. The year at the end doesn't really matter. Using the same ID in 2026 etc is totally fine. It's just the name.
- If this name is going to be changed, the code needs to be adjusted to the new name on the registration page and in a few automation scenarions.
- Co-host receives emails which have buttons that allow them to "edit registration", "cancel" and "pay".
- If the Co Host edits their registration, a automation will run which will change their their Updated status and add them to the "Updated Co Host" tab in the main database.
- The edit button in the email has attributes, so when it is clicked the button adds attributes to the URL of the page.
- Edit button attributes which are displayed in the page URL are used to add data back into the form fields through some JavaScript on the "edit registration" page.
- The payment button receives the URL based on what the member chooses through the registration, hotel/no hotel, people attending/alone. This is setup on the "Event Registration Template" page in webflow.
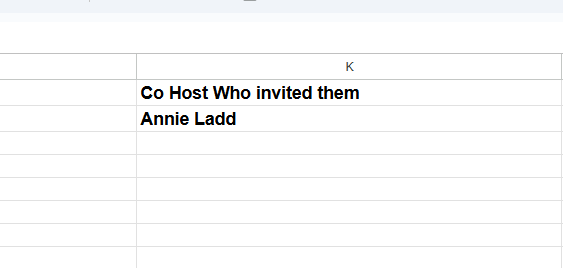
- Co-host's have the option to directly send invatations to people they intend to bring with them while registering. These people are stored into a database tab called "Cohost Partners" in the main database.
- Co-host's partner are sent to the "group registration" page, but the unique code they need to register is removed. When they register, it will say in the "CoHost Partners" tab the name of the co-host who invited them.
- Co-Host partners are also able to edit and cancel their registrations.
- Co-hosts have their own automations, like field partner and members.
This is the type of registration which should be used for all unexpected or group type of registrations. Registrations where the person going has someone else paying for them.
- The group registrations use the "custom" tab in the database.
- The Member ID which is generated in the CMS is used to track which organization/person paid for the invitation.
- Group registrants have the same options as members. They can edit and cancel. But they do not get any payment links.
- If they edit their registration they will have the status update and will be in the "Updated Custom" tab in the main database.
- We use buttons with custom attributes to sort and pre-fill edit forms.
- Group Registrations have their own automations.

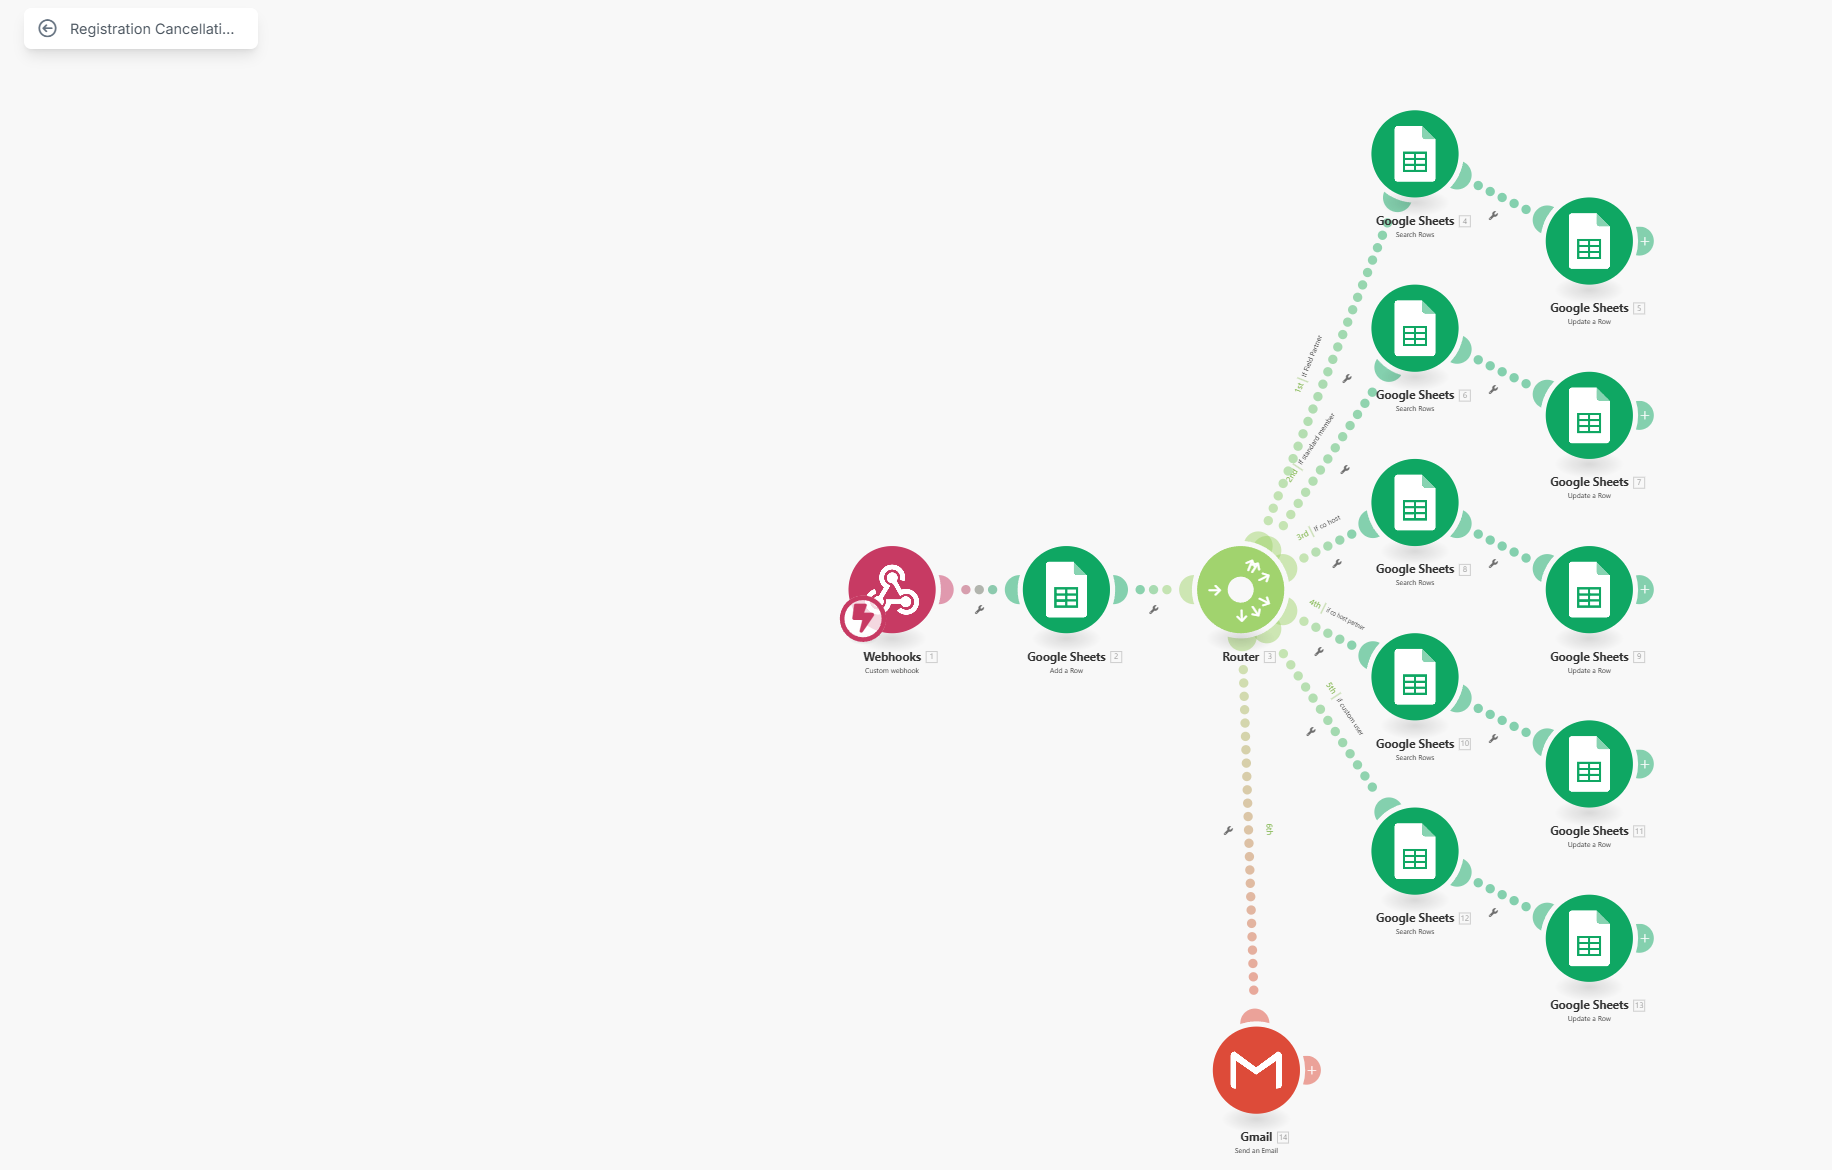
- We use one automation for all the cancellations.
- Each cancel button stores info from the person who registered into the HTML to grab the accurate data.
- We then check all the various databases; field partners, members, co-hosts, co-host partners and custom/group database to find an email that matches the email of the person cancelling.
- We update the database to change the status to "cancelled".
- We send an email notification to the person letting them know they canclled successfully.
- We send an email notification to admin@ letting them know a person has cancelled and who it is.
There are several custom email forms and HTML templates being used throughout.
- Field Member registration
- Member registration
- Co-host registration
- Group User registration
- Co-host partner registration invitation
- Field Member update registration
- Member update registration
- Co-host update registration
- Group user update registration
- Co-host partner update registration
- Cancellation success
- Field Partner flight booking
- Next steps Field Partner
- Next steps Member
- Next steps Co-host
- Next steps Co-host partner
- Next steps Group User
- Payment Reminder
- Payment Manual Send
- Payment Recieved
- Invoice setup
Each form has dynamic fields being used that inserts information like users registration details, name, payment information etc. Included in the forms are images like the O4J logo header and hero images which can be found in the webflow asset managers.